PROGRAMMING SCHOOL
Arduino MEGA-F5 / T5
1. STEP MOTOR15. MAGNETIC SENSOR (DIGITAL)
2. I2C - LCD 2 x 1616. HEAT SENSOR (ANALOGUE)
3. CAR + ULTRASONIC SENSOR17. IR SENSOR (ANALOGUE)
4. BARRIER: Photo sensor + Micro Switch18. IR SENSOR (DIGITAL)
5. COMMUNICATION - NRF24L0119. DC MOTOR - SPEED CONTROL (ANALOGUE)
6. ENCODER MOTOR - HALF STEP - BETTER PRECISION20. DC MOTOR - TWO WAYS ROTATION (DIGITAL)
7. ENCODER MOTOR - STEP - LESS PRECISE21. DC MOTOR - ONE WAY ROTATION (DIGITAL)
8. RX - TX COMMUNICATION22. DC MOTOR (DIGITAL)
9. I2C COMMUNICATION23. PHOTO SENSOR - LED LIGHT (ANALOGUE)
10. SERVO MOTOR24. PHOTO SENSOR - LED LIGHT (DIGITAL)
11. ULTRASOUND SENSOR (ANALOGUE)25. LED LIGHT - MICRO SWITHCH (ANALOGUE)
12. ULTRASOUND SENSOR (DIGITAL)26. LED LIGHT (ANALOGUE)
13. COLOR SENSOR - BLACK LINE27. LED LIGHT - MICRO SWITCH (DIGITAL)
14. COLOR SENSOR - COLORS28. LED LIGHT (DIGITALY)

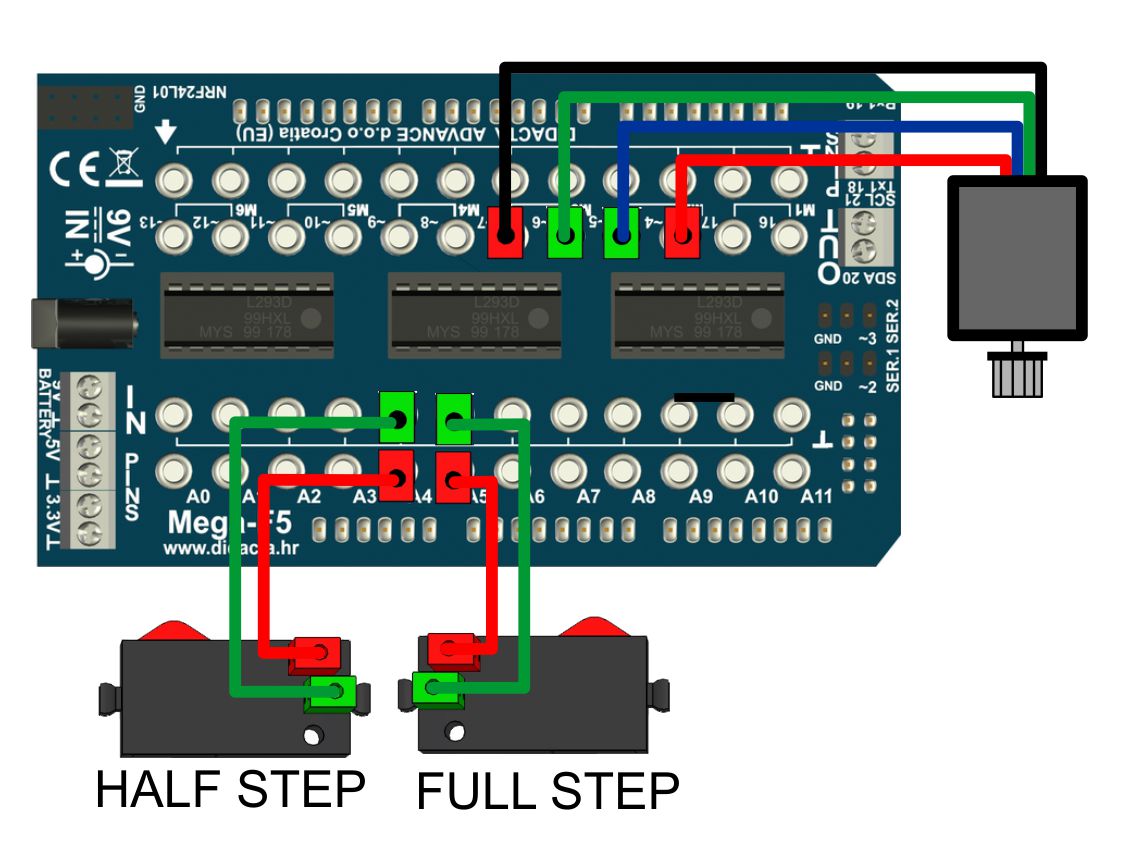
STEP MOTOR
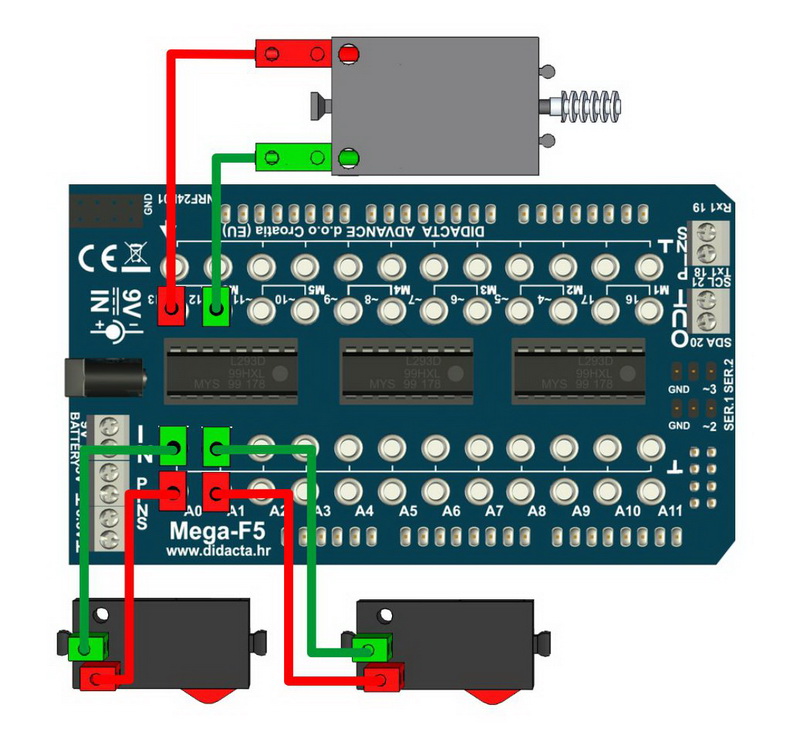
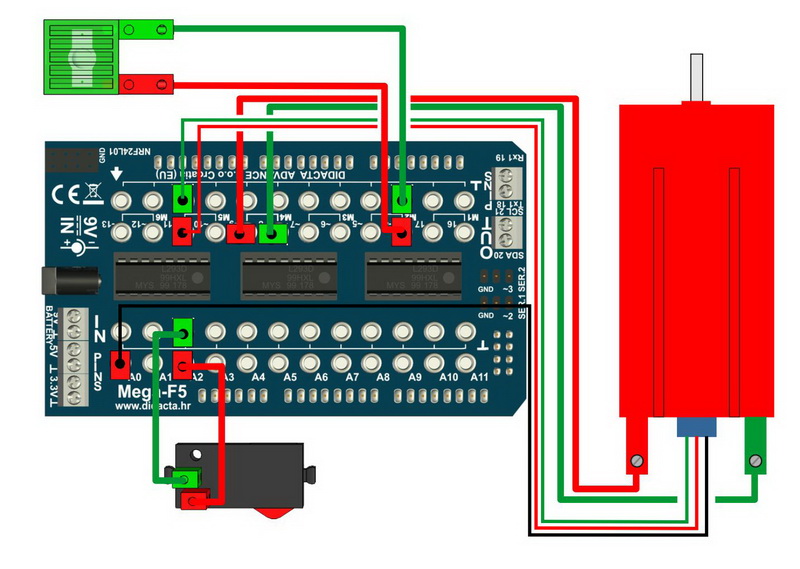
Mega_spoj_33.jpg

Example of stepper motor control in FULL step mode and HALF step mode. The speed is adjusted with the delay command. For this example, we used a motor that runs at 5V and supports a maximum of 180 steps for full speed. A step counter should be placed in the program for accurate control. Stepper motors are big consumers and care should be taken not to draw too much electricity as the drivers will get very hot. We use a voltage of 5V to power the shield and Mega.

I2C - LCD 2 x 16
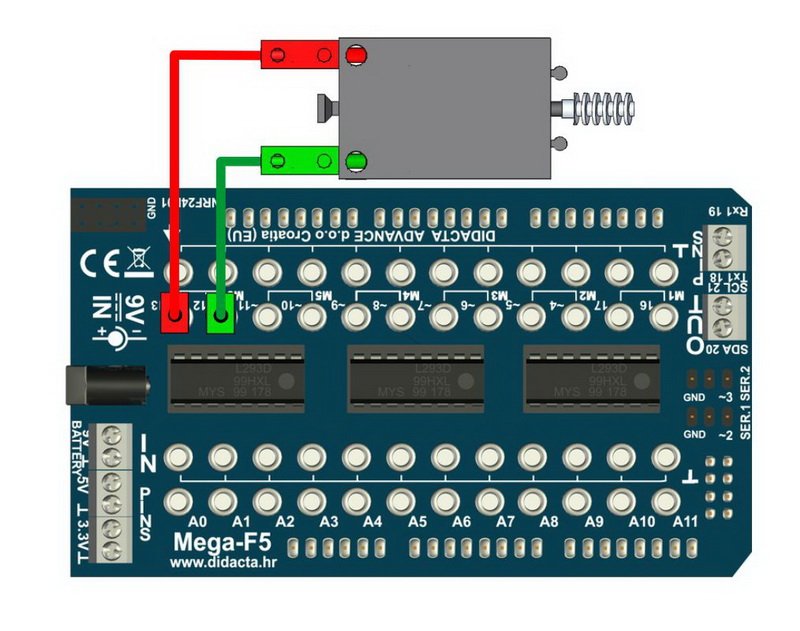
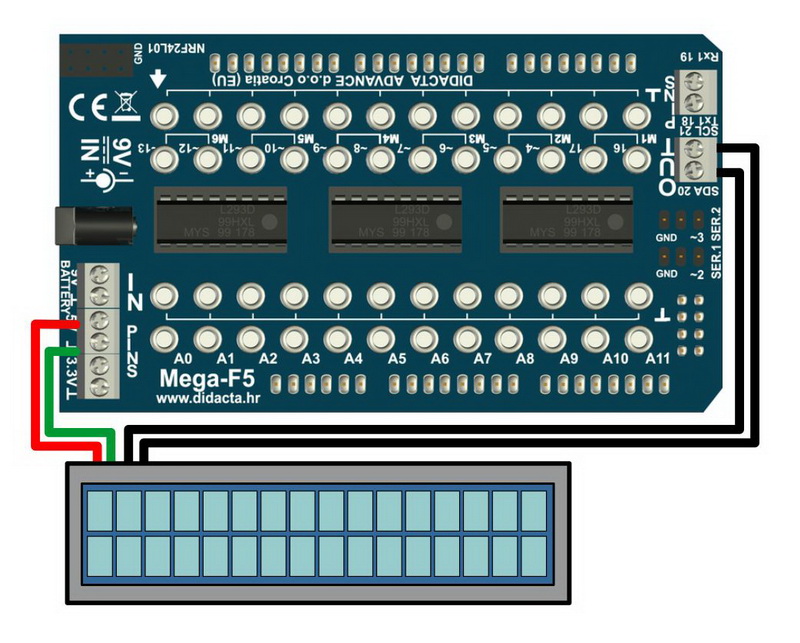
Mega_spoj_32.jpg

Display data on LCD. We use the LCD library to communicate with. As an example, we made a timer, showing minutes and seconds.

COMMUNICATION - NRF24L01
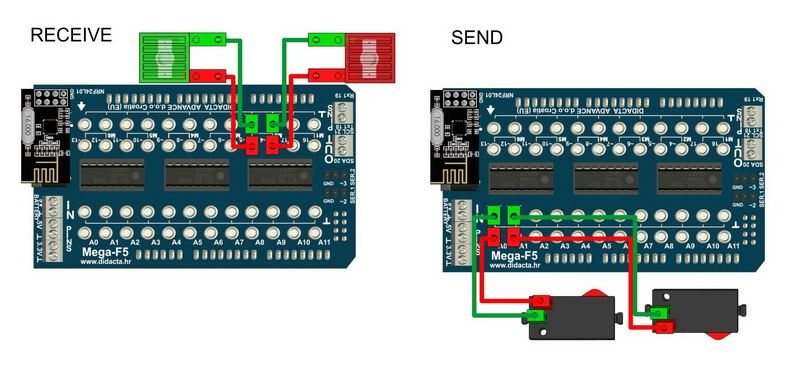
Mega_spoj_25.jpg

Two Arduino UNO moduls with NRF24L01 modul. Sending and reciving data. Program samples are for two LEDs (red and green) and two switches. If you use Uno-F5, not forget to change numbers of INPUTs on which are switches connected (SEND program).

ENCODER MOTOR - HALF STEP - BETTER PRECISION
Mega_spoj_24.jpg

We count the state changes (values 1 and 0). This method is better accurate than the previous one (STEP). The number of impulses we will count depends on the program itself. If the program only controls the engine, or still performs other operations. In the second case, especially at higher engine speed, the program will not be able to read all pulses.

ENCODER MOTOR - STEP - LESS PRECISE
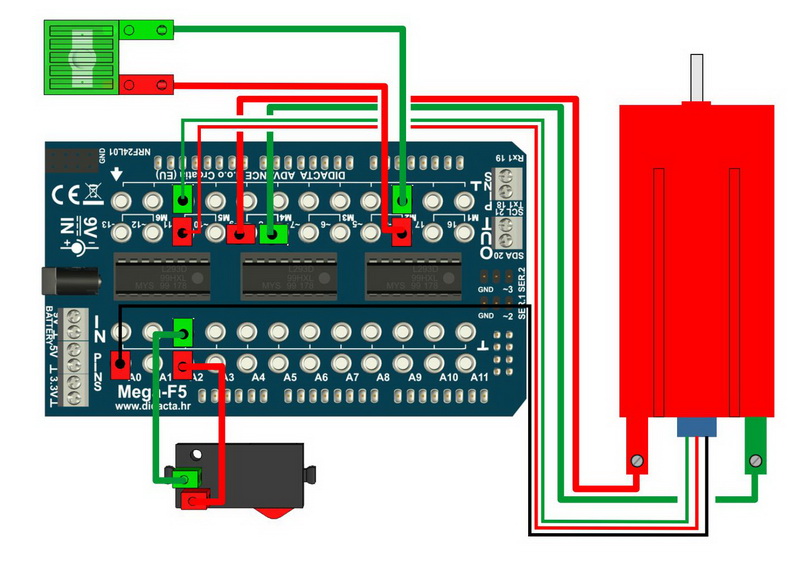
Mega_spoj_23.jpg

We only count impulses (value 1). So we need to put a little pause to prevent multiple sensor readings. This method is less precise. The number of impulses we will count depends on the program itself. If the program only controls the engine, or still performs other operations. In the second case, especially at higher engine speed, the program will not be able to read all pulses.

RX - TX COMMUNICATION

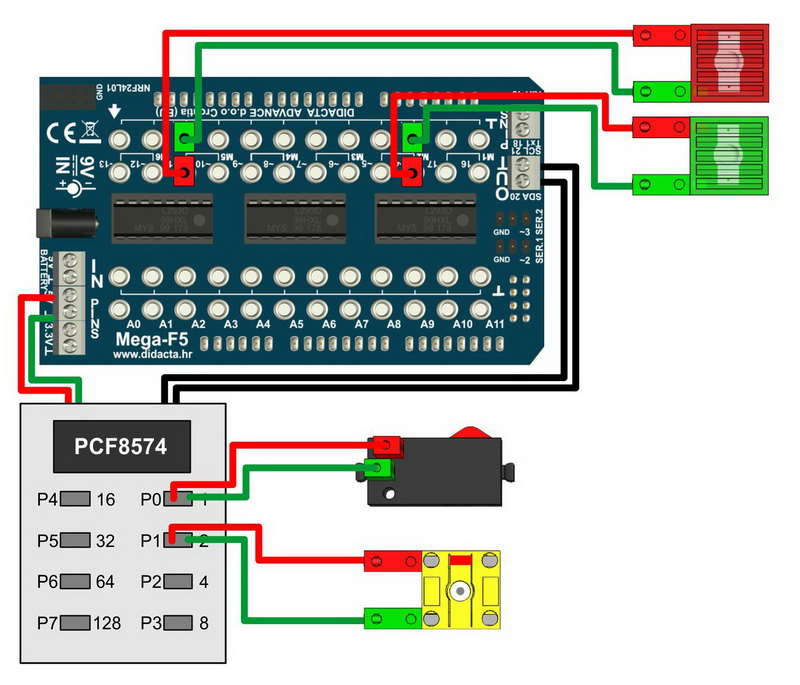
I2C COMMUNICATION
Mega_spoj_21.jpg

SERVO MOTOR
Mega_spoj_20.jpg

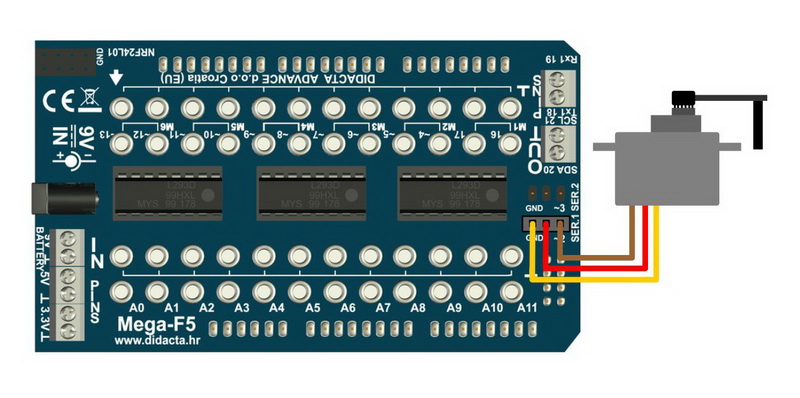
Servo motor control example. Turning the servo motor lever by 45 and 90 degrees.

ULTRASOUND SENSOR (ANALOGUE)
Mega_spoj_19.jpg

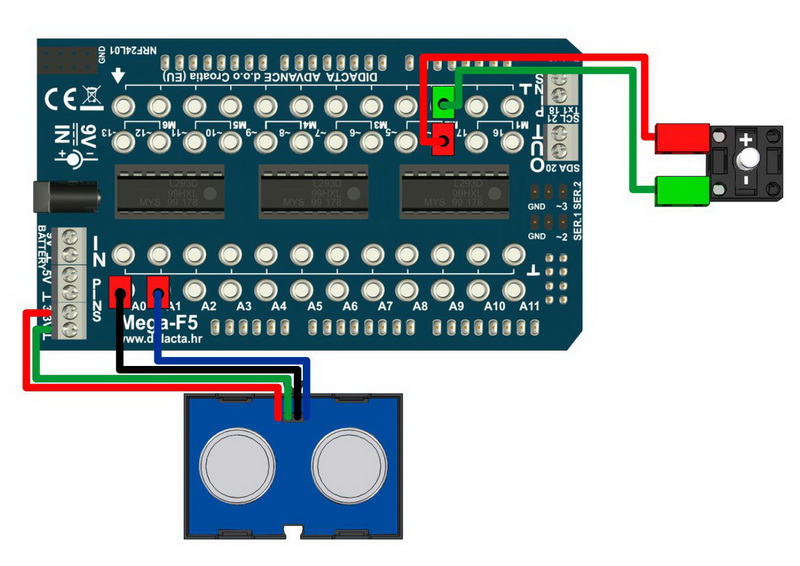
Using the ultrasonic sensor, we can measure the distance to the object in front of the sensor. Depending on the sensor, larger or smaller maximum distances can be read. The LED illuminates less when the distance from the sensor to the subject is smaller and vice versa.

ULTRASOUND SENSOR (DIGITAL)
Mega_spoj_18.jpg

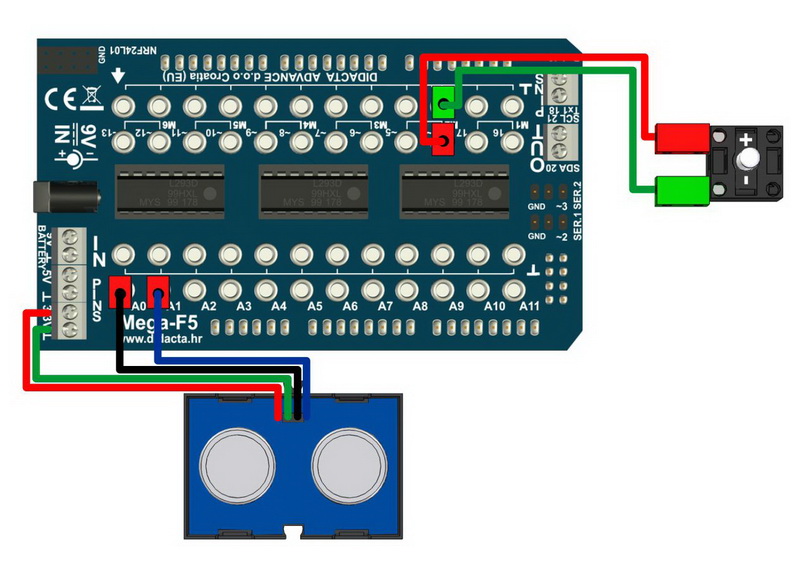
With the help of an ultrasonic sensor we can detect an object when it is at a distance less than the one set in the program (the LED lights up). If the object is at a greater distance, the program will not register it.

COLOR SENSOR - BLACK LINE
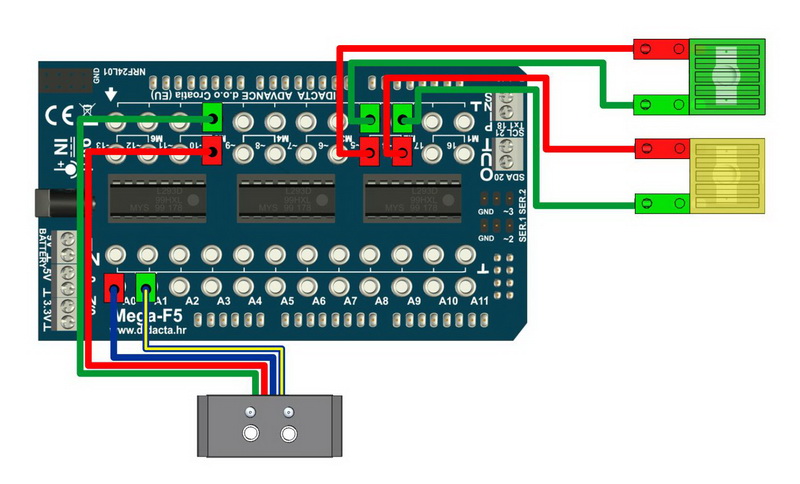
Mega_spoj_17.jpg

The readings for white and black are usually different enough, so that with the help of two color sensors we can make robot car that follows the black line.

COLOR SENSOR - COLORS
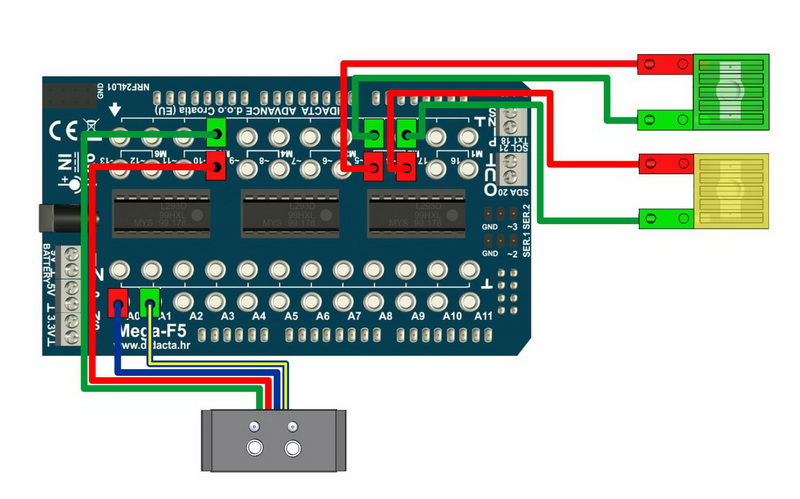
Mega_spoj_16.jpg

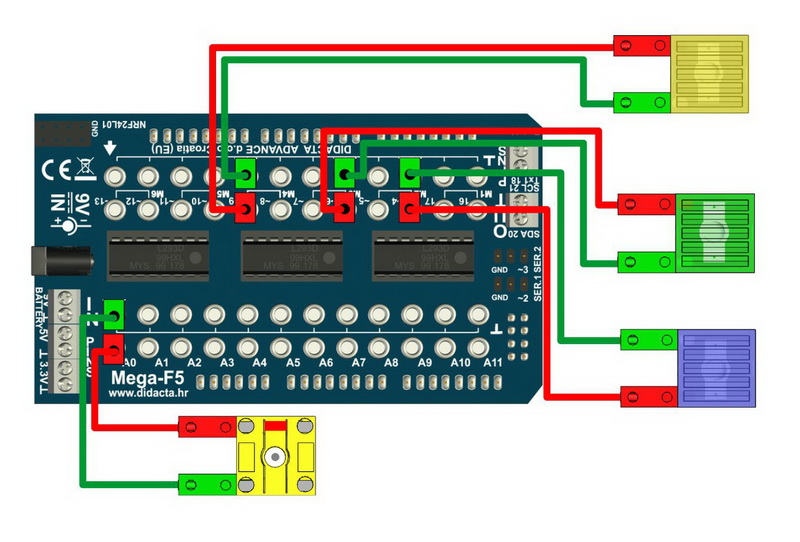
The color sensor reads colors as values (analog). According to the apparent color value, a certain color of the LED lights up. The readings are VERY dependent on the conditions (illumination) and may vary even though the color patterns are the same

MAGNETIC SENSOR (DIGITAL)
Mega_spoj_15.jpg

A magnetic sensor detects a magnetic field. By approaching the sensor to a magnetic field (permanent or electromagnet), the LED lights up.

HEAT SENSOR (ANALOGUE)
Mega_spoj_13.jpg

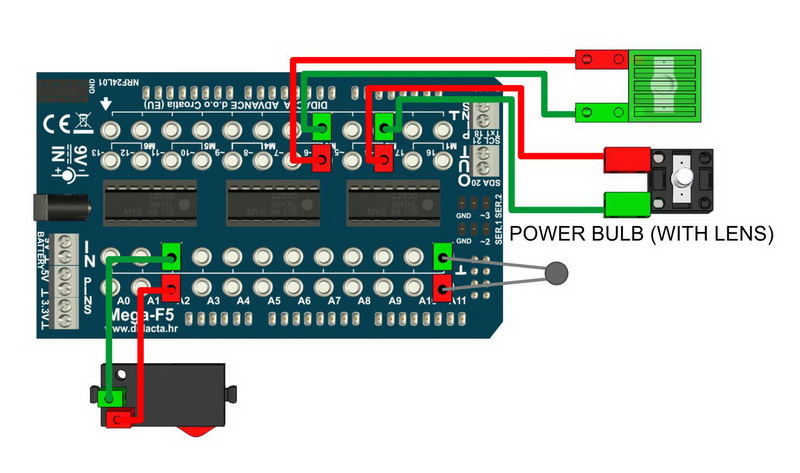
By heating the thermal sensor to a certain temperature, the LED lights up. We heat the thermal sensor with light bulb.

IR SENSOR (ANALOGUE)
Mega_spoj_12.jpg

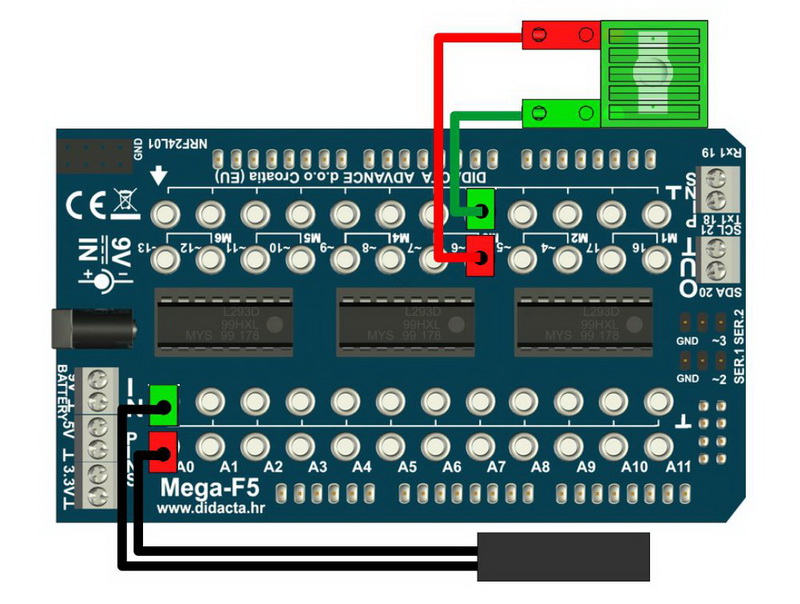
By analogous reading of the IR sensor, a white surface can be detected at a distance of several centimeters.

IR SENSOR (DIGITAL)
Mega_spoj_11.jpg

Depending on the IR sensor readout, the LEDs light up. The white surface gives the reading 1 and the black (line) 0.

DC MOTOR - SPEED CONTROL (ANALOGUE)
Mega_spoj_10.jpg

Program, changes the rotation speed of the DC motor. Lower rotation speed, usually means lower engine power.

DC MOTOR - TWO WAYS ROTATION (DIGITAL)
Mega_spoj_09.jpg

Pressing the switch A and B, alternates the direction of rotation of the DC motor (both directions).

DC MOTOR - ONE WAY ROTATION (DIGITAL)
Mega_spoj_08.jpg

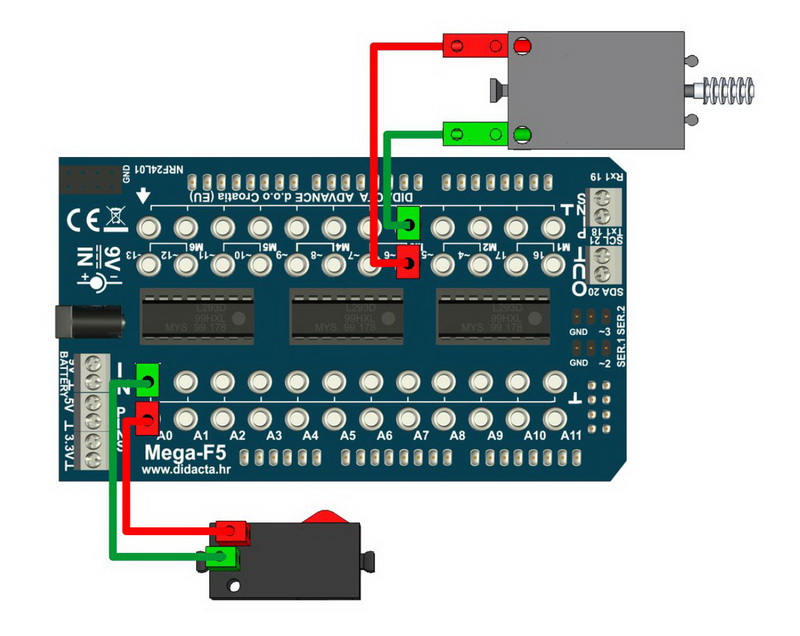
By pressing switch, the DC motor starts to rotate in one direction.

DC MOTOR (DIGITAL)
Mega_spoj_07.jpg

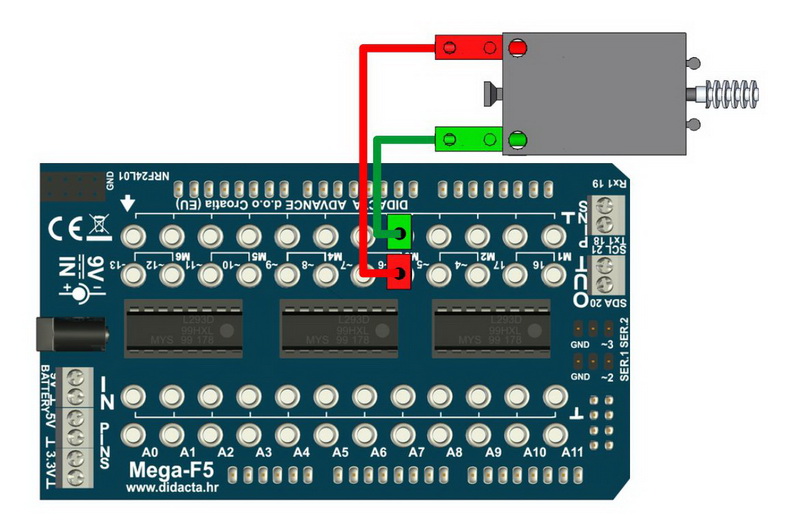
The DC motor starts rotating in one direction for 100 ms. It stops for 2 seconds and then repeats the action.

PHOTO SENSOR - LED LIGHT (ANALOGUE)
Mega_spoj_06.jpg

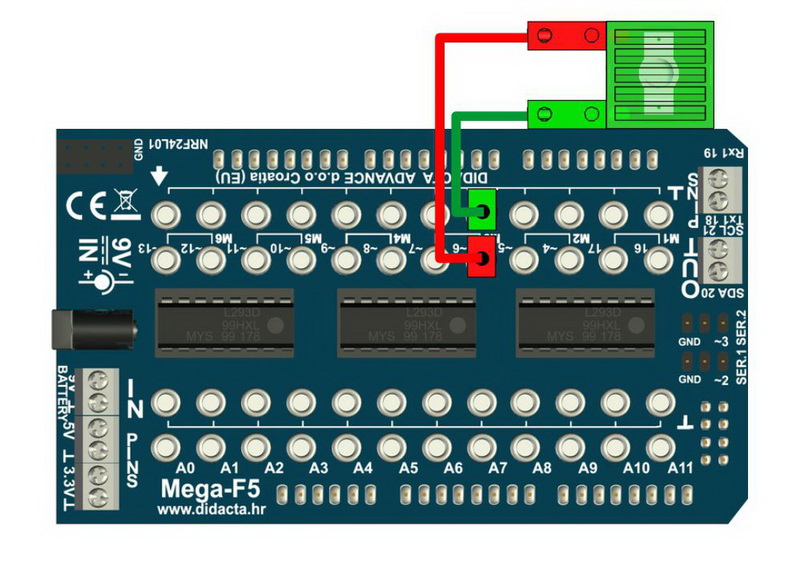
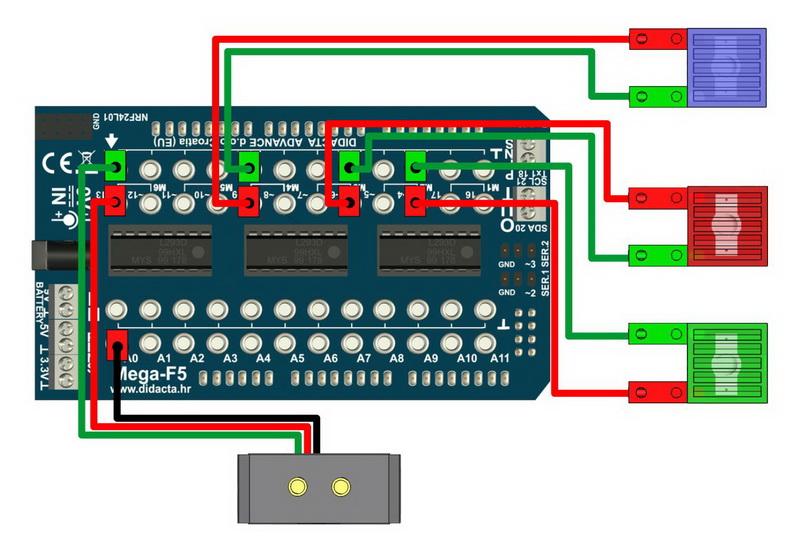
The LEDs light up depending on the value read by the PHOTO sensor.

PHOTO SENSOR - LED LIGHT (DIGITAL)
Mega_spoj_05.jpg

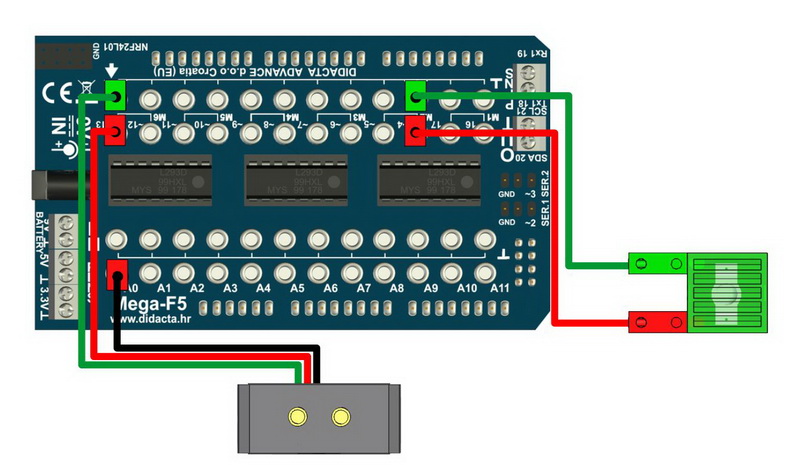
The LEDs light up when the PHOTO sensor is sufficiently illuminated.

LED LIGHT - MICRO SWITHCH (ANALOGUE)
Mega_spoj_04.jpg

By pressing the button, the bright LEDs light up.

LED LIGHT (ANALOGUE)
Mega_spoj_03.jpg

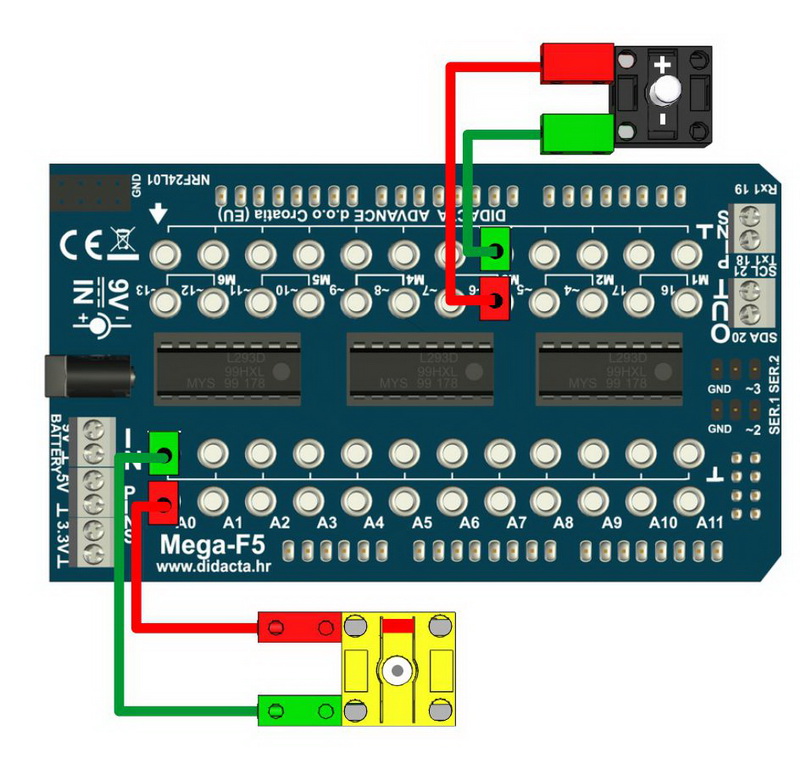
The program slowly increases the brightness of the LED.

LED LIGHT - MICRO SWITCH (DIGITAL)
Mega_spoj_02.jpg

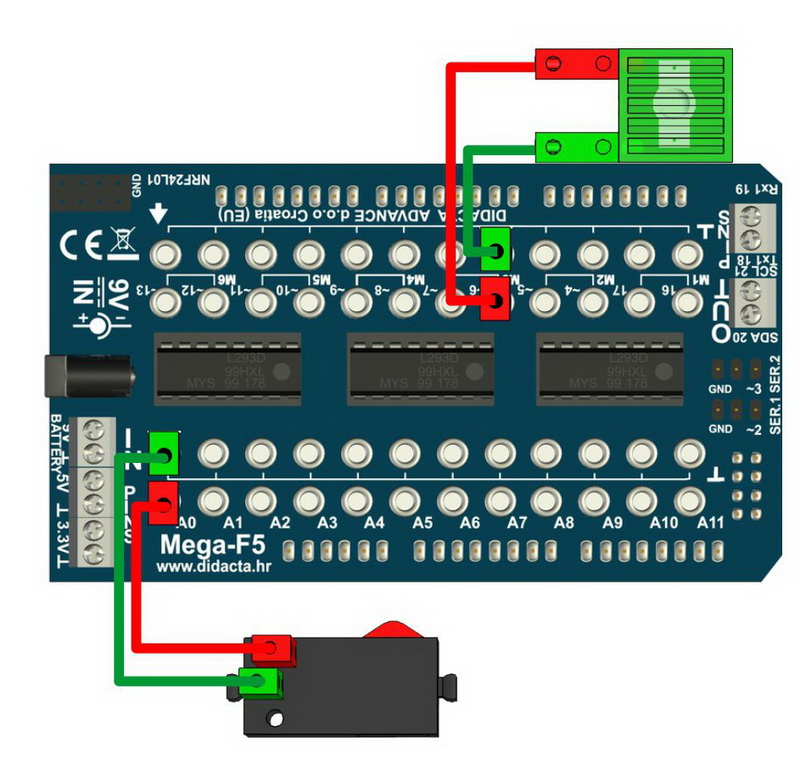
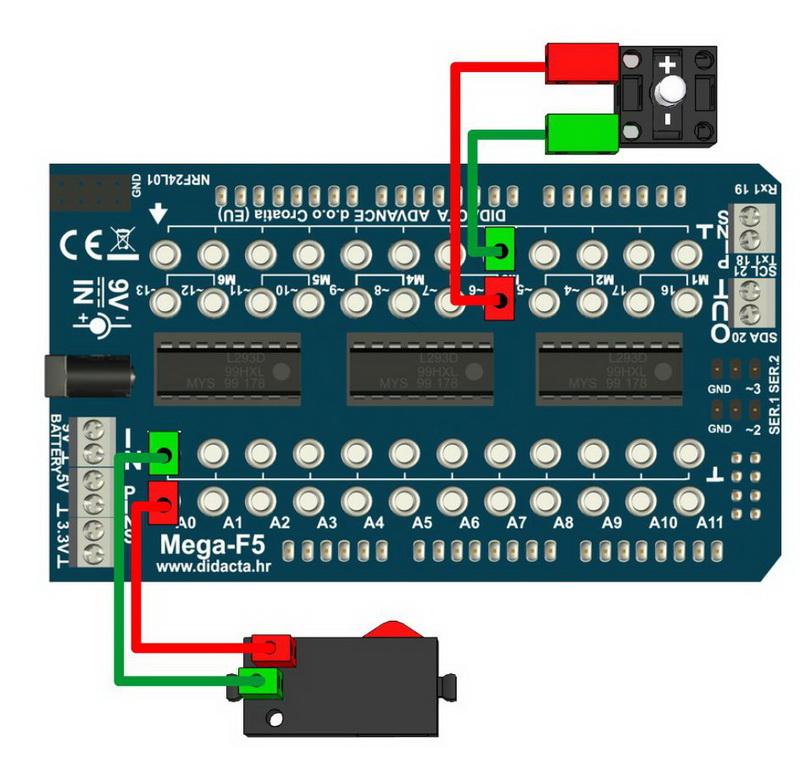
Pressing the switch, the LED lights up.

LED LIGHT (DIGITALY)
Mega_spoj_01.jpg

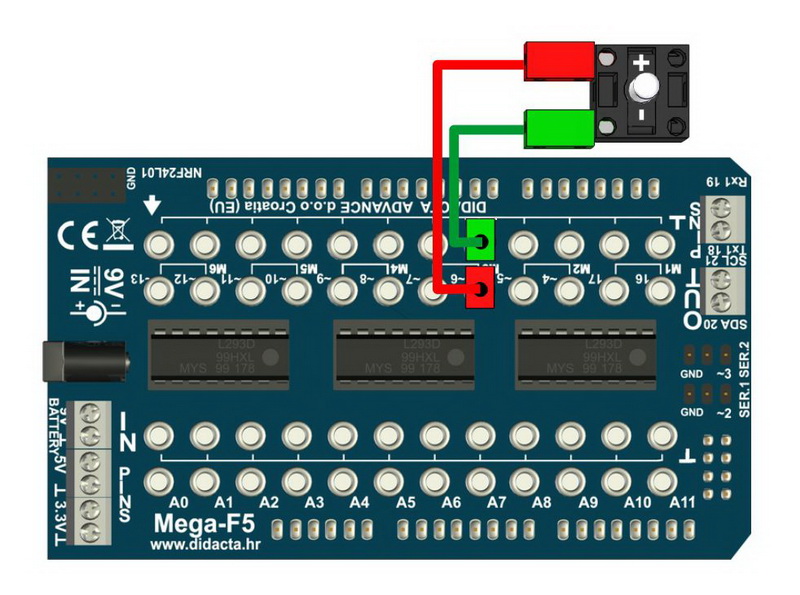
The LED lights up and goes out at half-second intervals.